
Appearance
AdminSite Settings → Announcements
Announcements are messages that appear on the user home page. Use them for system-wide news, policy updates, downtime notices, or anything users should see on their next sign-in. For the reader's side of this, see Read announcements.
Open Settings → Site Settings → Announcements.
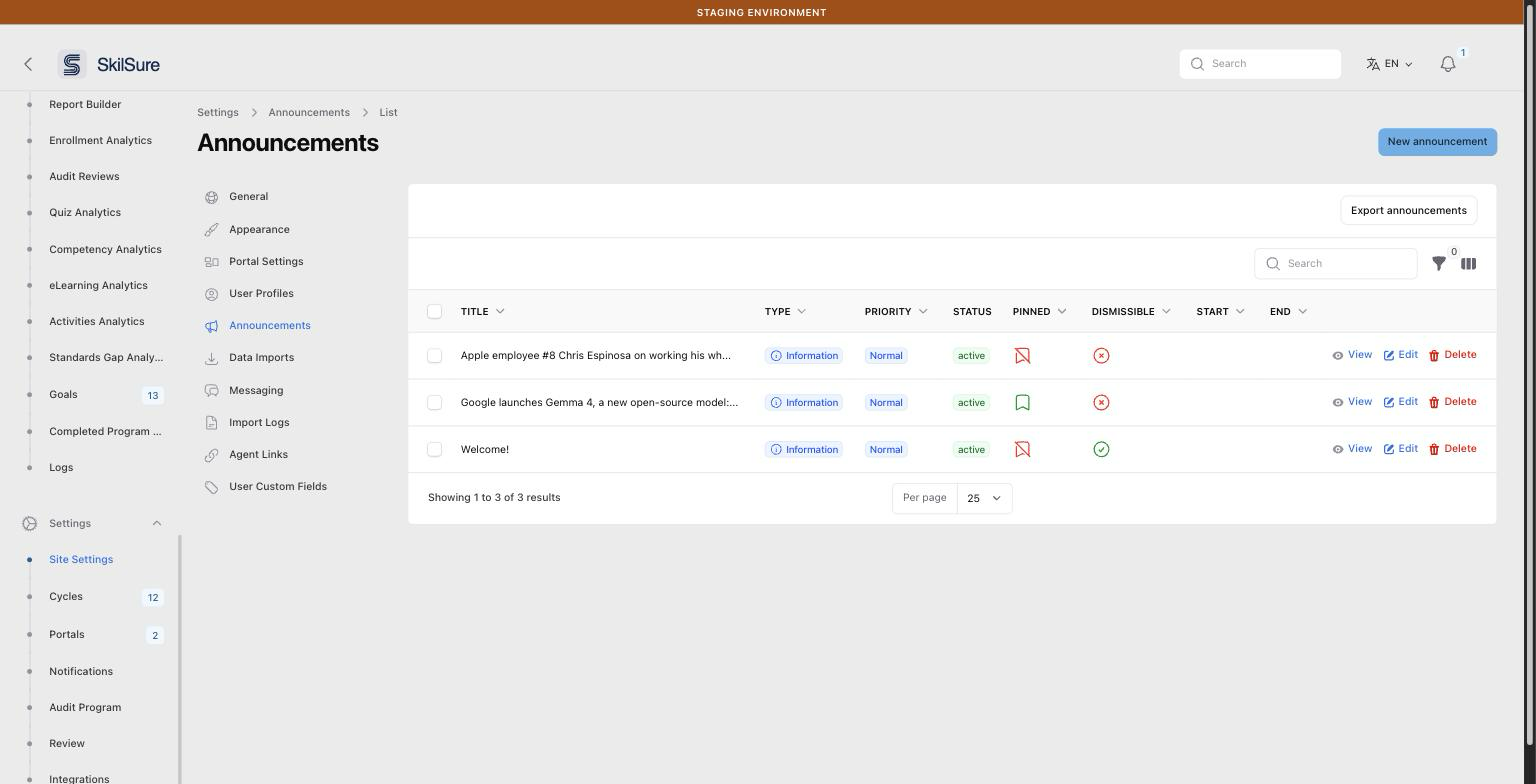 Announcements list. Each row summarises type, priority, status, and whether the announcement is pinned or dismissible.
The list view
Columns:
- Title — the announcement heading.
- Type — visual styling (Information, Warning, Success, Danger) that drives colour and icon.
- Priority — Low, Normal, High or Urgent. Higher priority announcements appear first.
- Status — active, scheduled (start date is in the future), expired (end date has passed), or inactive (the Active toggle is off).
- Pinned — pinned announcements stay at the top of the user's list.
- Dismissible — whether users can dismiss the announcement once they've read it.
- Start / End — the schedule, if one is set.
Use the search box to find an announcement by title, and the filter icon to narrow the list by Type, Priority, Active or Pinned. The column icon next to it toggles extra columns — including Dismissed, a count of how many users have dismissed each announcement.
Export announcements downloads the list as CSV.
Create an announcement
Click New announcement in the top-right.
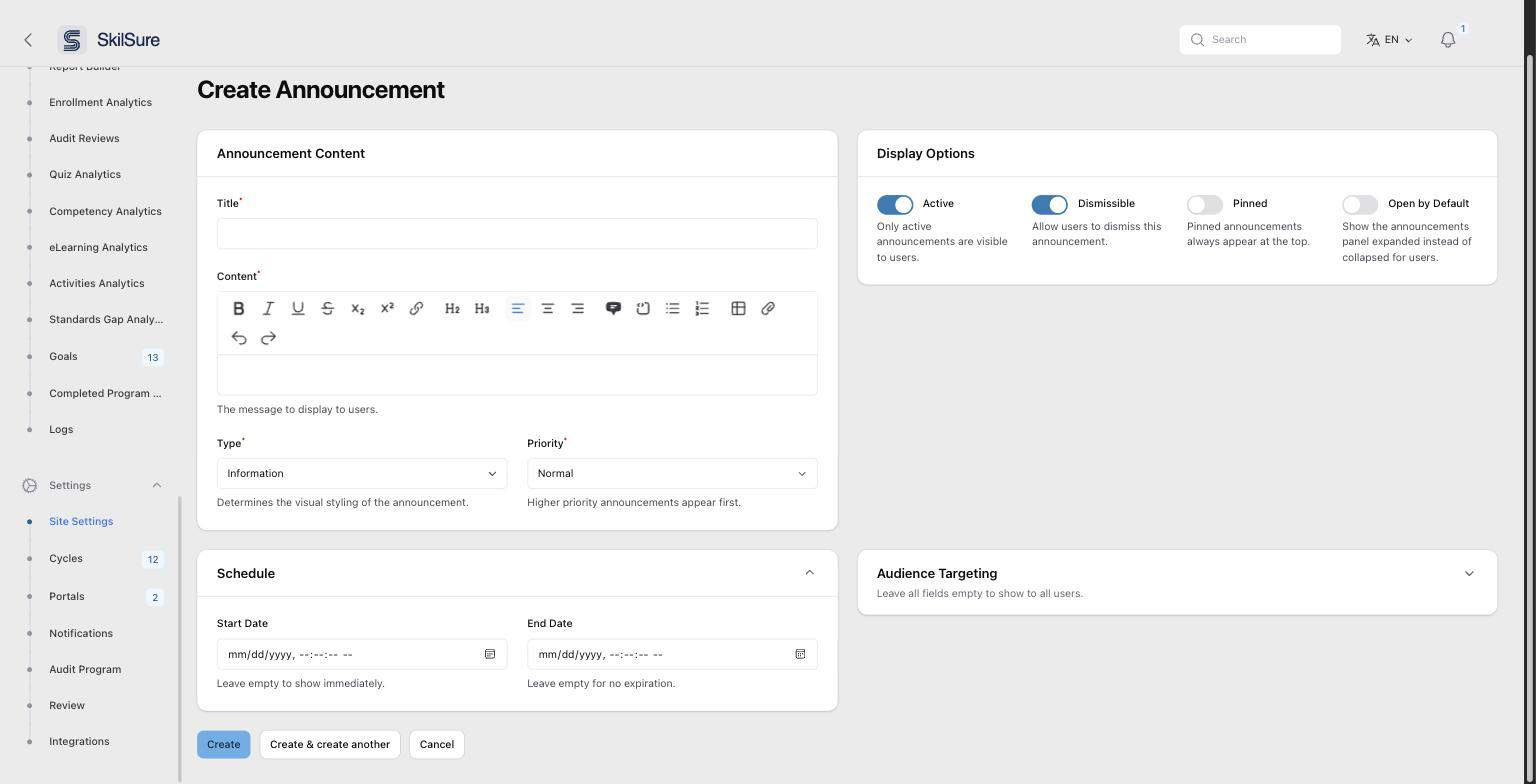 Create Announcement — content on the left, display options and targeting on the right.
Announcement Content
- Title — required, up to 255 characters. Shown at the top of the announcement.
- Content — required. Rich-text body. Supports headings, links, lists, tables, and attachments.
- Type — Information, Warning, Success or Danger. Determines the colour and icon users see. Defaults to Information.
- Priority — Low, Normal, High or Urgent. Defaults to Normal. High shows an Important tag to users; Urgent shows an Urgent tag.
Display Options
- Active — only active announcements are visible. On by default.
- Dismissible — when on, users get a ✕ button and can dismiss the announcement permanently. On by default.
- Pinned — pinned announcements always sit at the top of the user's list, above non-pinned ones.
- Open by Default — the user's announcements panel is normally collapsed. Turn this on and the panel loads already expanded for anyone who can see this announcement. Use it sparingly, for messages that must not be missed.
Schedule
- Start Date — leave empty to show the announcement immediately on save.
- End Date — leave empty for no expiration; otherwise the announcement is automatically hidden after this date.
Audience Targeting
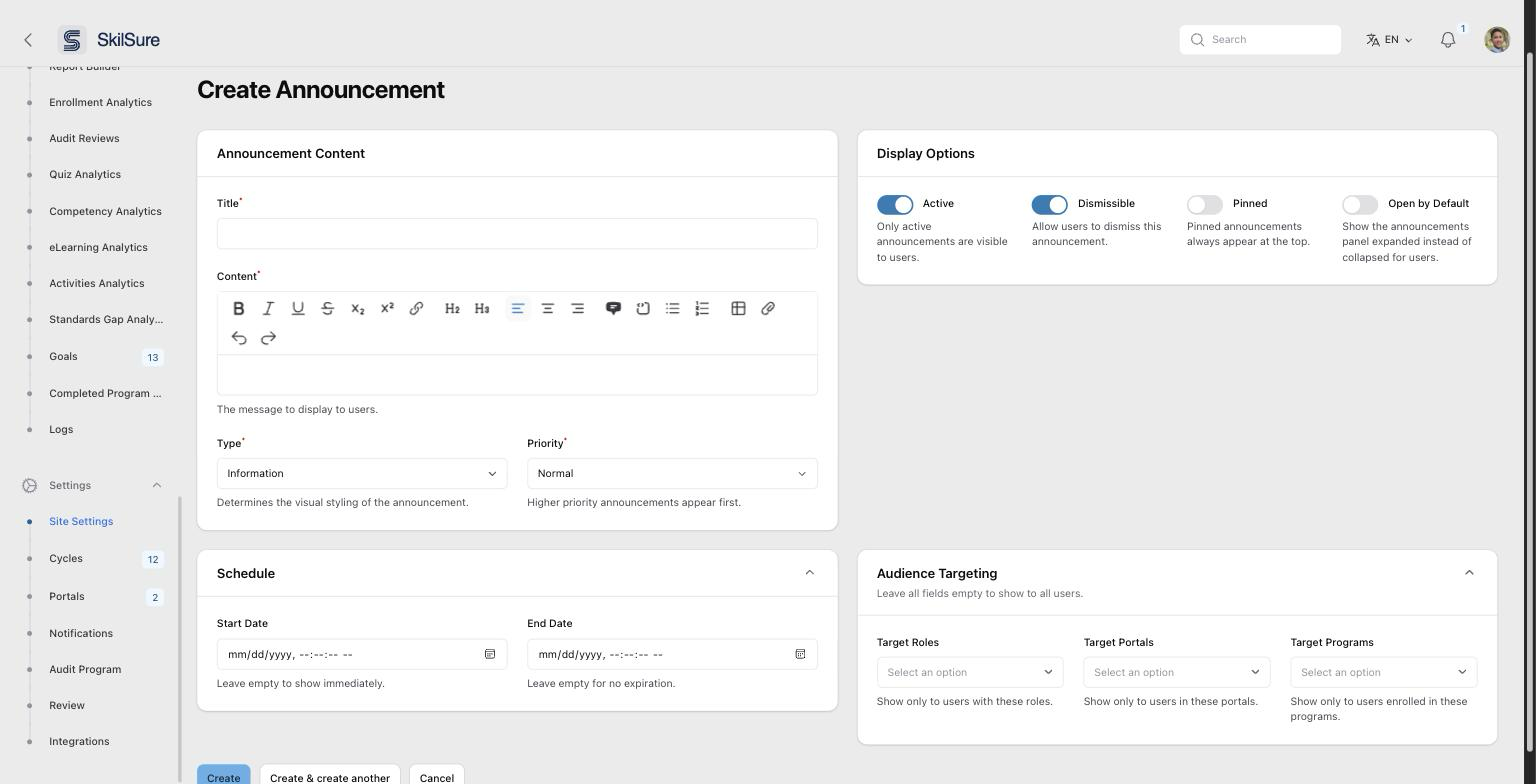 Audience Targeting. Expand the panel to scope an announcement; leaving all four fields empty shows it to everyone.
Leave all four fields empty to show the announcement to every user. Otherwise pick any combination of:
- Target Roles — show only to users with these roles.
- Target Portals — show only to users in these portals.
- Target Programs — show only to users enrolled in these programs.
- Target Cycles — show only to users enrolled in these program cycles. Each option is listed as Program - Cycle, so pick the exact run you mean.
Targeting fields combine with OR, not AND
A user sees the announcement if they match any filled field — not all of them. Targeting Role: Mentor plus Portal: Ontario reaches every mentor and everyone in the Ontario portal, not just Ontario's mentors. To reach one precise group, use a single field.
Program or cycle?
Target Programs reaches everyone enrolled in a program, whichever cycle they're in. Target Cycles narrows that to one run of it — use it for messages tied to a specific year's deadlines or requirements. Don't fill both for the same program: because the fields combine with OR, adding the program widens the audience back out to every cycle.
Portal targeting follows the portal the user is currently viewing. A user who belongs to two portals sees a portal-targeted announcement only while they're in that portal.
Programs and cycles whose program has been deleted don't appear in these lists.
Click Create to save, or Create & create another to save and start a fresh form.
Edit or delete an announcement
Each row has three actions:
- View — read-only summary of the announcement.
- Edit — opens the same form as above. Change anything, including the schedule and targeting, and click Save changes. Edits take effect immediately. The edit page also carries View and Delete buttons in its top-right corner.
- Delete — removes the announcement, with a confirmation prompt.
Editing doesn't bring it back for anyone who dismissed it
Dismissals are per-user and permanent. If you edit an announcement that people have already dismissed, they won't see the updated version. Post a new announcement instead.
Change several at once
Tick the checkboxes on the rows you want, then use Bulk actions.
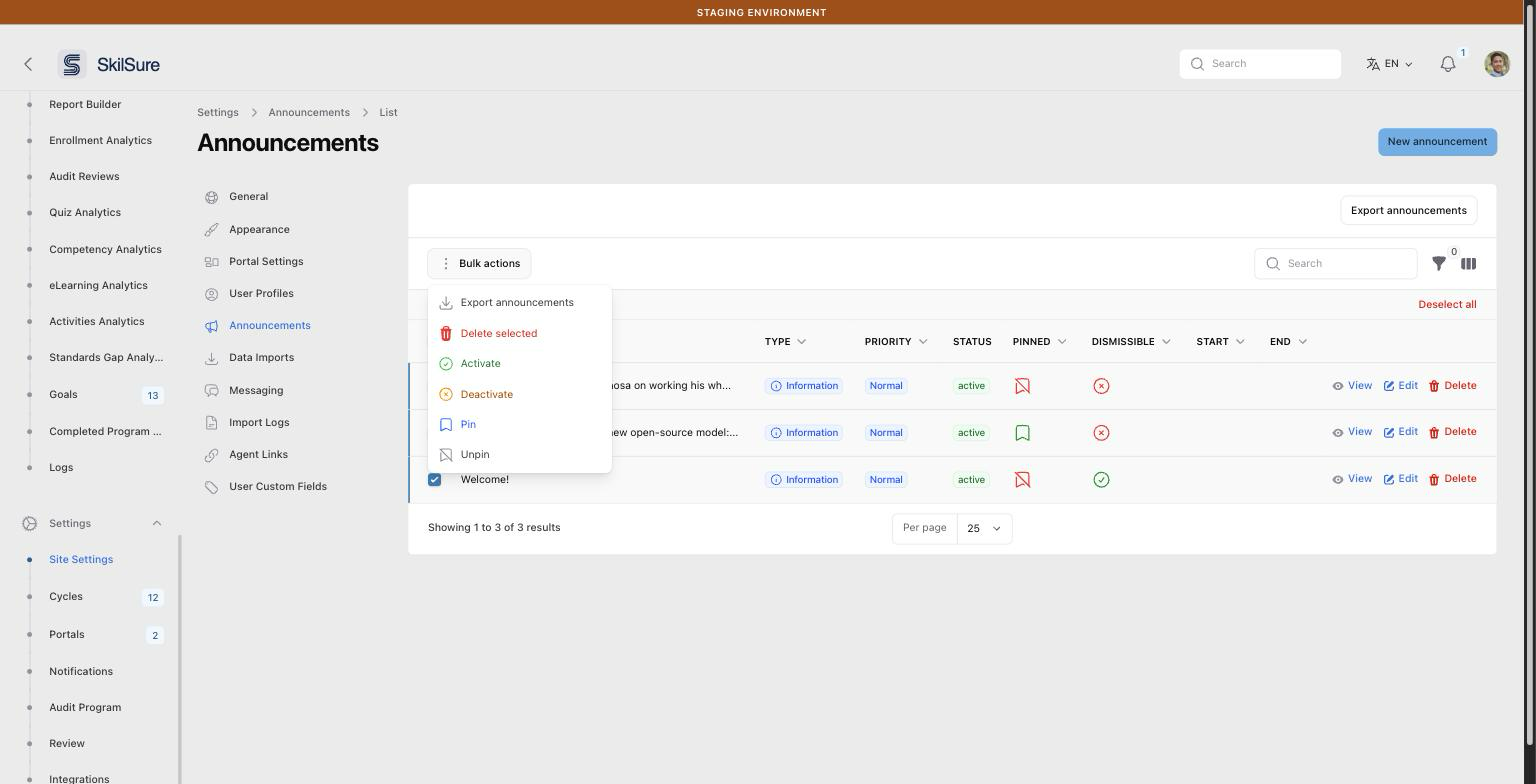 Bulk actions. Select rows, then activate, deactivate, pin, unpin, export or delete them in one go.
- Export announcements — CSV of just the selected rows.
- Delete selected — deletes them all, with a confirmation prompt.
- Activate / Deactivate — flips the Active toggle. The quickest way to pull a live announcement without deleting it.
- Pin / Unpin — flips the Pinned flag.
Drafting before publishing
Save with Active off to draft an announcement without showing it. Toggle it on later — or set a future Start Date so it goes live automatically.
Chasing a deadline
To pair an announcement with automated reminder emails, see Deadline reminders.
Pinned + Dismissible
A pinned announcement can also be dismissible — but once a user dismisses it, they won't see it again even though it's still pinned for others. For critical sticky messages, leave Dismissible off.