
Appearance
AdminManage content
Content is the reusable material your steps point to — pages, videos, quizzes, activities, and document uploads.
Browse the content library
Open Content Management → Contents.
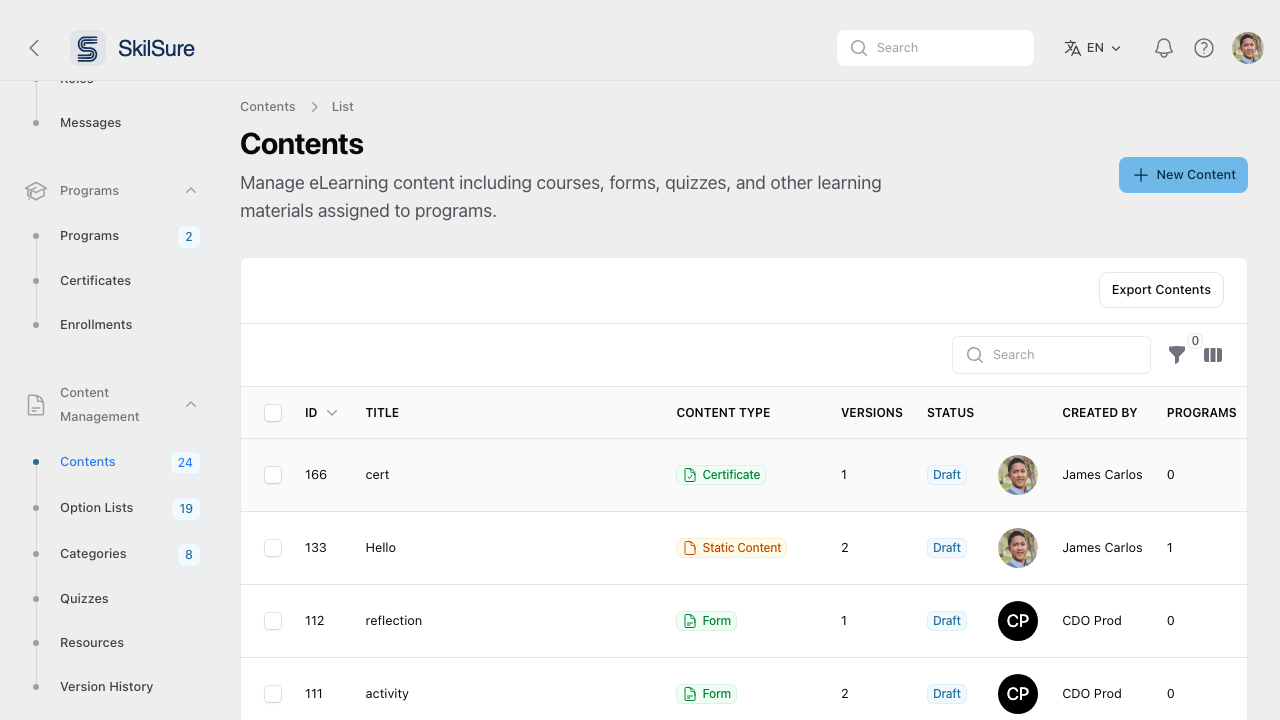 The content library. Each item can be attached to multiple program steps.
Create a new content item
Click New Content and choose a type.
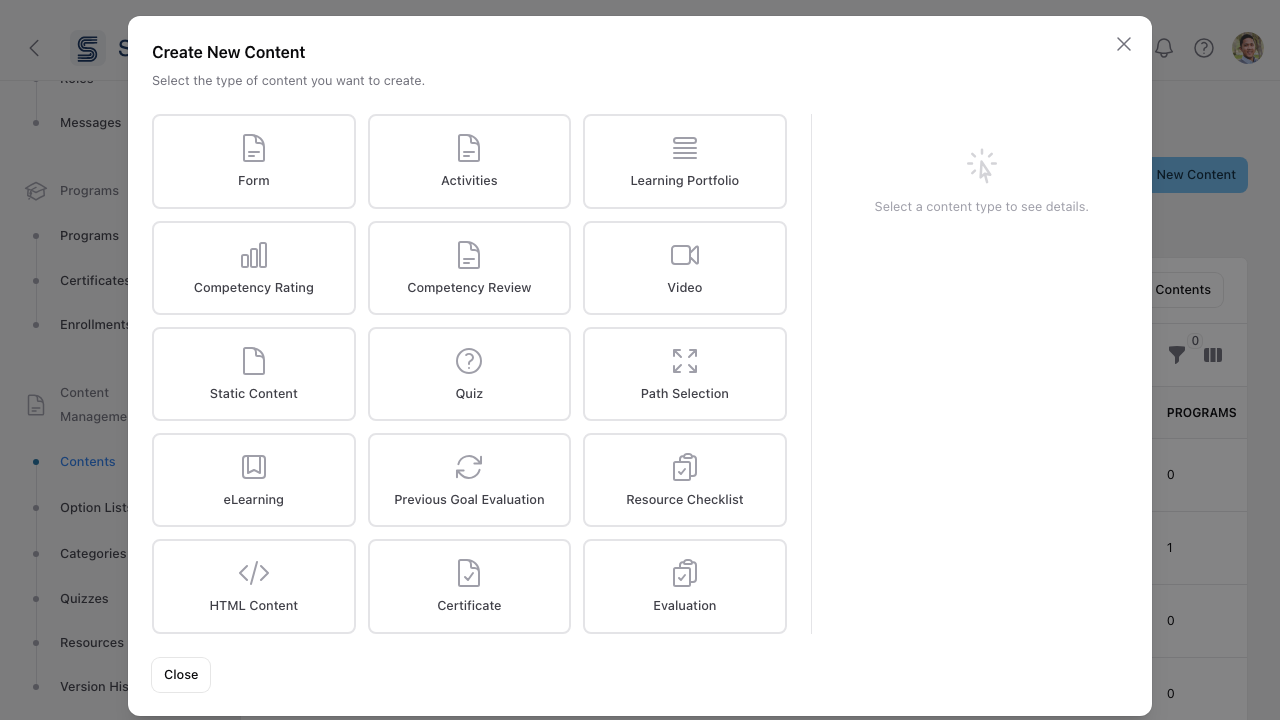 Content type picker. Each type opens its own editor.
- Click New Content.
- Pick a content type. Common ones include:
- Static Content — a rich-text page or lesson.
- Video and eLearning — embedded media and SCORM-style courses.
- Quiz — graded multiple-choice and other question types.
- Form and Activities — structured submissions and tasks.
- Learning Portfolio, Resource Checklist, Path Selection — portfolio and pathway tools. See Path Selection steps.
- Competency Rating, Competency Review, Previous Goal Evaluation — competency-mapped assessments.
- Fill out the editor and save.
- Attach the content to a program step from the program's Steps tab.
Categories & option lists
These live alongside Contents. Use them to keep content findable as your library grows. See Option lists for managing the choices forms offer.
Choose what a Form step shows the user
Open a Form content item and switch to the Completion Configuration tab. The Display Configuration section controls what appears around the form on the user's step.
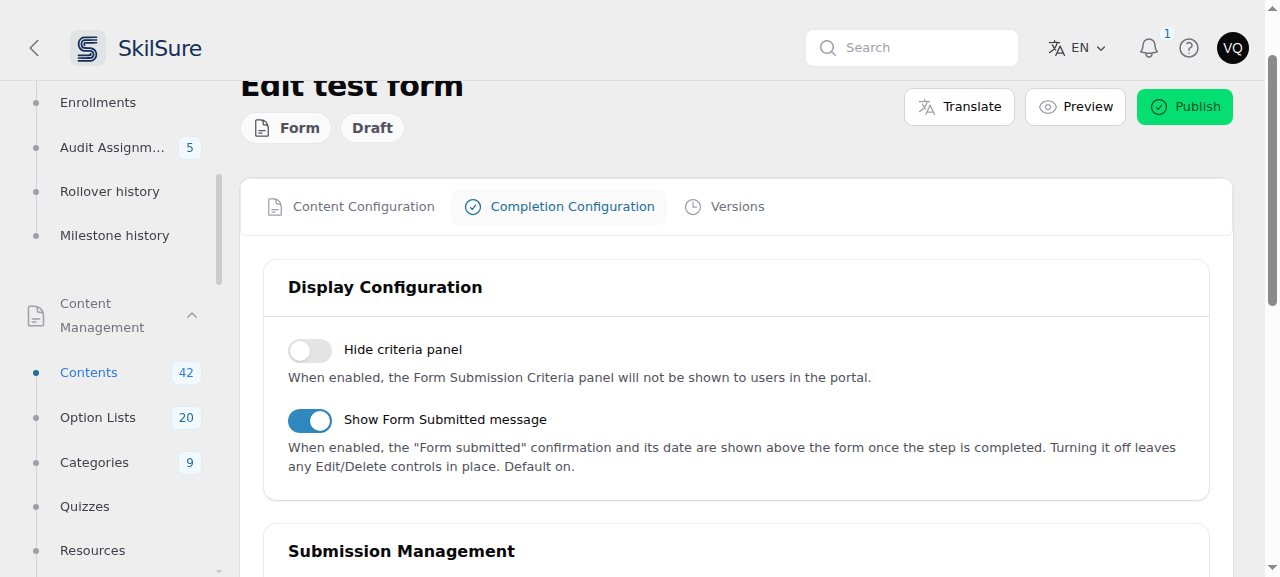 Display Configuration on a Form content item. Both settings change only what the user sees — neither affects whether the step completes.
- Hide criteria panel — off by default. The Form Submission Criteria panel sits above the form and tells the user how many submissions are required or still allowed. Turn this on to remove it.
- Show Form Submitted message — on by default. Once the user completes the step, a confirmation reading Form submitted and the date they submitted appears between the step title and the form. Turn this off to remove that confirmation, leaving the user their completed answers with no banner above them.
Turning the message off keeps Edit and Delete
If you allow users to change their submissions (Submission Management → Allow editing / Allow deleting), those buttons sit inside the same confirmation. Switching Show Form Submitted message off keeps them — they simply move to a plain row above the form. Turning them off is a separate decision.
Reword it instead of hiding it
If the confirmation is right but the wording isn't, leave the switch on and change the text under Settings → Custom Text — the Forms group, tagged Form content. See Reword text with Custom Text.
Existing Form content is unaffected: the message was always shown before this setting existed, so every form keeps showing it until you turn it off.
Need a form in more than one language? See Translate forms.